Introduction to HTML Form Elements
In Web Development Technologies (especially for the front-end), “HTML” is the basic or primary markup language that we use to display the web pages (the page which we see on a website). Sometimes, in an HTML page, along with the other content display, we need to take some user inputs as well (especially in dynamic web sites). And to take the user inputs in an HTML page, we need to use multiple form elements to create those forms properly, and with the help of those forms, we correctly take the user inputs and put those inputs (data) in our internal Databases at the back-end. Now, as we know that HTML codes are written under various tag elements (<>), so, basically, “HTML Form Elements” are those elements that are used inside a “<form>” tag, and these elements, along with other standard and unique attributes, give a form and structure as well, which let the users know what to do with the form and how to proceed in a structural manner.
👉Explain HTML Form Elements (including syntax and examples with output)
Since there are multiple HTML form elements to create a form & give the form a proper look in a structured way, below are some of them explained one by one.
| SL No. | Tags | Meanings / Descriptions |
| 1 | <form> | To define a HTML form for user inputs |
| 2 | <input> | To define input control |
| 3 | <datalist> | To specify a list of pre-defined options |
| 4 | <fieldset> | To define group related elements |
| 5 | <keygen> | To define a secure input |
| 6 | <label> | To define a label of input |
| 7 | <legend> | To define a caption for fieldset |
| 8 | <optgroup> | To define a group of similar options.
|
| 9 | <option> | To define an option for the drop-down. |
| 10 | <output> | To define a result |
| 11 | <select> | To define a list of the drop-down. |
| 12 | <textarea> | To define a multiline input area. |
Syntax and Example
Some syntaxes and examples of HTML Form Elements with outputs are discussed below:
1. “<form>” element
This element can contain many other elements as well including the below:
- <input>
- <output>
- <label>
- <select>
- <button>
- <option>
- <textarea>
- <optgroup>
- <fieldset>
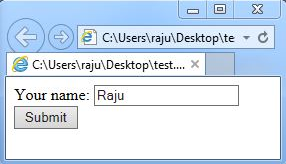
Example for a “<form>” element with input and submit button:
Syntax:
<form action="/test_page.php" method="get">
Your Name: <input type="text" name="name"><br>
<input type="submit" value="Submit">
</form>
Codes:-
<!DOCTYPE html>
<html>
<body>
<form action="/test_page.php">
Your name: <input type="text" name="Name" value="Raju"><br>
<input type="submit" value="Submit">
</form>
</body>
</html>
Output:-
2. “<input>” element
This element is an inline element and belongs to the form-element group.
Syntax:-
<form action="/test_page.php">
Input name: <input type="text" name="name"><br>
Input age: <input type="text" name="age"><br>
<input type="submit" value="Submit">
</form>
Codes:-
<!DOCTYPE html>
<html>
<body>
<form action="/action_page.php">
Input name: <input type="text" name="name" value=""><br>
Input age: <input type="text" name="age" value=""><br>
<input type="submit" value="Submit">
</form>
</body>
</html>
Output:-

3. “<datalist>” element
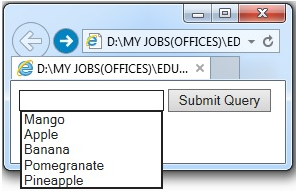
It usually specifies a pre-defined list of inputs for <input> element where users can choose any option from the pre-defined list.
Syntax:-
<input list="fruits">
<datalist id="fruits">
<option value="Mango">
<option value="Apple">
<option value="Banana">
<option value="Pomegranate">
<option value="Pineapple">
</datalist>
Codes:-
<! DOCTYPE html>
<html>
<body>
<form action="/test_page.php" method="get">
<input list="fruits" name="fruit">
<datalist id="fruits">
<option value="Mango">
<option value="Apple">
<option value="Banana">
<option value="Pomegranate">
<option value="Pineapple">
</datalist>
<input type="submit">
</form>
</body>
</html>
Output:
4. “<fieldset>” element
This element is basically used to group related elements in forms and draws a box around similar elements.
Syntax:-
<form>
<fieldset>
<legend>Celebrity:</legend>
Name: <input type="text"><br>
Phone: <input type="number"><br>
Age: <input type="text">
</fieldset>
</form>
Codes:-
<!DOCTYPE html>
<html>
<body>
<form>
<fieldset>
<legend>Celebrity:</legend>
Name: <input type="text"><br>
Phone: <input type="number"><br>
Age: <input type="text">
</fieldset>
</form>
</body>
</html>
Output:-

5. “<keygen>” element
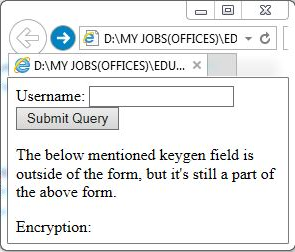
This element may be located outside the form, but it might still be a part of the form. Usually, this element is used to specify one or more forms. This element is newly used in the HTML5 version to generate an encryption key to pass encrypted data over a form in a website based on HTML.
Syntax:-
<keygen form="form_id">
Codes:-
<!DOCTYPE html>
<html>
<body>
<form action="/test_page.php" method="get" id="secureform">
Username: <input type="text" name="user_name">
<input type="submit">
</form>
<p>The below mentioned keygen field is outside of the form, but it's still a part of the above form.</p>
Encryption: <keygen name="security" form="secureform">
</body>
</html>
Output:-
6. “<label>” element
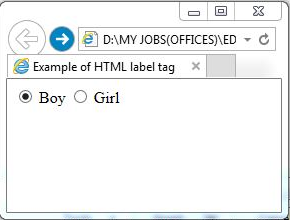
This element basically gives a name for the input form to make the users understand what input data it should be. It acts as an indicator for users.
Syntax:-
<label for="control id" > ... </label>
Codes:-
<!DOCTYPE html>
<head>
<title>Example of HTML label tag</title>
</head>
<body>
<form>
<input type="radio" name="gender" value="boy" id="boy">
<label for="boy">Boy</label>
<input type="radio" name="gender" value="girl" id="girl">
<label for="girl">Girl</label>
</form>
</body>
</html>
Output:-
7. “<legend>” element
This element actually defines a caption for a <fieldset> element. It’s kind of a supporting element for another element, a part of the group element.
Syntax:-
<fieldset>
<legend>Celebrity:</legend>
Name: <input type="text"><br>
Phone: <input type="number"><br>
Age: <input type="text">
</fieldset>
Codes:-
<!DOCTYPE html>
<head>
<title>Example of HTML legend tag</title>
</head>
<body>
<form>
<fieldset>
<legend>Celebrity:</legend>
Name: <input type="text"><br>
Phone: <input type="number"><br>
Age: <input type="text">
</fieldset>
</form>
</body>
</html>
Output:-

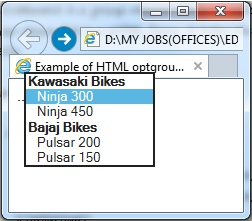
8. “<optgroup>” element
This element is a group-related element used for options in a drop-down list in an HTML form. It helps the users to handle a long list easily.
Syntax:-
<select>
<optgroup label="Kawasaki Bikes">
<option value="ninja300">Ninja 300</option>
<option value="ninja450">Ninja 450</option>
</optgroup>
<optgroup label="Bajaj Bikes">
<option value="pulsar200">Pulsar 200</option>
<option value="pulsar150">Pulsar 150</option>
</optgroup>
</select>
Codes:-
<!DOCTYPE html>
<html>
<head>
<title>Example of HTML legend tag</title>
</head>
<body>
<select>
<optgroup label="Kawasaki Bikes">
<option value="ninja300">Ninja 300</option>
<option value="ninja450">Ninja 450</option>
</optgroup>
<optgroup label="Bajaj Bikes">
<option value="pulsar200">Pulsar 200</option>
<option value="pulsar150">Pulsar 150</option>
</optgroup>
</select>
</body>
</html>
Output:-
9. “<option>” element
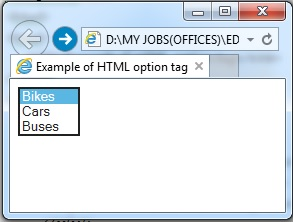
This element is used to represent an option from a dropdown list under <select> element; the dropdown list must contain at least one option.
Syntax:-
<option value="option-value"> ... </option>
Codes:-
<!DOCTYPE html>
<html>
<head>
<title>Example of HTML option tag</title>
</head>
<body>
<form>
<select>
<option value="Bikes"> Bikes </option>
<option value="Cars"> Cars </option>
<option value="Buses"> Buses </option>
</select>
</form>
</body>
</html>
Output:-
10. “<output>” element
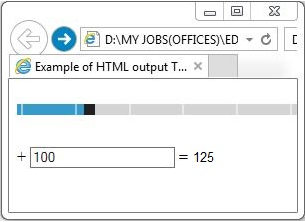
This element is basically used to show the output of a calculation (e.g. in a scripted calculation).
Syntax:-
<output> ... </output>
Codes:-
<!DOCTYPE html>
<html>
<head>
<title>Example of HTML output Tag</title>
</head>
<body>
<form oninput="result.value=parseInt(x.value)+parseInt(y.value)">
<input type="range" id="x" value="50"> +
<input type="number" id="y" value="100"> =
<output name="result" for="x y"></output>
</form>
</body>
</html>
Output:-
11. “<select>” element
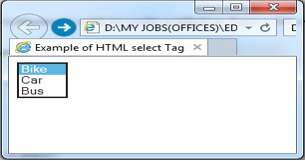
This element is used to make a selection from a list within a form.
Syntax:-
<select>
<option value="Bike">Bike</option>
<option value="Car">Car</option>
<option value="Bus">Bus</option>
</select>
Codes:-
<!DOCTYPE html>
<html>
<head>
<title>Example of HTML select Tag</title>
</head>
<body>
<form>
<select>
<option value="Bike">Bike</option>
<option value="Car">Car</option>
<option value="Bus">Bus</option>
</select>
</form>
</body>
</html>
Output:-
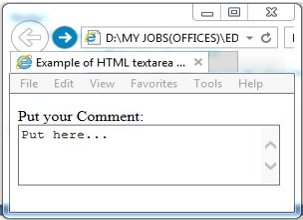
12. “<textarea>” element
This element is used to define multi-line text inputs (e.g. for address).
Syntax:-
<form>
<p>Put your Comment:
<textarea cols="50" rows="6">Put here...</textarea>
</p>
</form>
Codes:-
<!DOCTYPE html>
<html>
<head>
<title>Example of HTML textarea Tag</title>
</head>
<body>
<form>
<p>Put your Comment:
<textarea cols="30" rows="4">Put here...</textarea>
</p>
</form>
</body>
</html>
Output:-
Conclusion
There are so many HTML form elements available; in this article, we have discussed some of the basic or native form elements. It helps us to create proper and functional HTML forms. The point to be noted is that most of the HTML form elements need a few attributes to be included along with them. Some of the elements depend on each other, which must be coded together. All the browsers may not display the elements which are already deprecated.
Recommended Articles
This has been a guide to HTML Form Elements. Here we discuss the basic concept examples of HTML Form Elements with code implementation and outputs. You can also go through our other suggested articles to learn more –


3 Comments
With HTML you can create your own Web site. This book teaches you everything about HTML. HTML is easy to learn- you will enjoy it.
ReplyDeleteWith HTML you can create your own Web site. This book teaches you everything about HTML. HTML is easy to learn- you will enjoy it.
ReplyDeleteBe careful
hi
ReplyDelete